Mobile Monday | Using Tags in the Collect App
Annette Haring
Hello! Welcome to my second post of my "Mobile Monday" feature! Thanks for the great feedback! I'm excited to share more about how I use mobile technology for memory keeping and excited to hear what you are using as well. I can easily get in a comfort zone and keep using the same apps, etc. I'm going to be challenging myself to try new apps, new techniques, etc as a way to keep learning and keep it fun.

The first thing you need to do is add a tag to your photo card in Collect.

Start by tapping the edit icon to bring up the edit screen. Here is where you add your title, notes, etc. You can also tap Tags and the tags screen comes up. Here you can add a tag by typing it in the box. You can also search with this screen or just move the screen up or down to find your tag. I honestly don't have too many tags or I would get overwhelmed.
You can see below, all you do is tap to select your tag, and you can select more than one for a photo. On the bottom right you can see the tag is now added to the photo card, and when you do a search from your main calendar view, this will now be included in the search.


The second step isn't actually required, but it's a nice feature so you can get a view of what photos you have tagged. This is helpful if you are wanting to do a collage with a certain number of photos. If you don't have enough, you can go back through the photos and see if there are more that you can tag, which is what I did for my collage. I knew I had started a pretty good collection, but had been a bit lazy about adding tags. (I honestly consider it a pretty big accomplishment if I even get photos added, so adding tags for me is like adding the lime to my Diet Coke…it's just so good and easy to do but I never want to actually slice up the lime. Just too much work so it seems. But seriously so good if I will do it!)

To search tags, from your main calendar view, tap the bottom right icon. It's three little dots. When you tap that, the search tags and show dates comes up. Tag "Search tags" and the next screen is the tag screen, where you can search or scroll to find your tags. Simply tap on the tag you want and then it will bring up all the photos you have tagged.
Here is my 2014 album. You can see there are 20 photos. Below that you can see my 2013 album, which has 66 photos. Plenty for me to use for the mega collage. I just repeated the export process for both albums. (I'll go more into why I do different albums for each year in another post.)


Now you are ready to begin exporting your photos to use in your collage. (You can also use them for a scrapbook or Project Life®/pocket page layout, mini book, photo book or other photo project.)
From your main calendar view, this time tap on the bottom left icon, which looks like a little rectangle with an up arrow on it. Tap on that icon and the Export Photos option opens up. Tap on Export Photos, then for photos only, select Export Style and then the Photos Only.
You can change the dates by selecting those, scrolling back to January or whenever you started your album.

Next, tap the back arrow so you are on the main Export page. Now you are ready to select the tag to export.

Tap on the Tags button and the Tags screen will come up. Select the tags you want to export and then select back to the main export page.
Now you are ready to export! At the very bottom is the Export button. Tap Export, and either Camera Roll or Dropbox for where you want to save your photos to. I selected Camera Roll. Photos will be exported to your camera roll. (note if you have a lot it may take a few minutes)

And there you have it! Photos from a tag that you have now curated over time to really show the story you want to tell with photos. (You can always add words, and I highly suggest that you do, but photos curated over time really tell a story as well.)

Then export the photos so they are ready to use. If you are playing along using other software or another app, export and save your photos so they are ready to be made into a collage next week.
Today I wanted to share more about how I made the "super mega collage" from last week. My plan is to break it down into three parts, and share one part each week.

First, this week I want to share how I use tags in the app Collect on my iPhone to curate and gather photos for stories I may want to tell. You can use the principles here even if you don't use Collect. See if the photo system you use includes tags or create folders to gather photos into that you want to keep. (Hint: you can even use tags, or hashtags, in Instagram and have those photos printed in one batch from Persnickety Prints.) In week 2, I want to share how to create the collage. I used PicFrame, but there are different apps that can get you the same result. And finally for week 3, I will share how to finish it up by adding the word art overlay. I used the app Over, but there are quite a few really great apps out there that you can use.
Before we get too much into the details, I wanted to review what a tag is and why you might want to use them.
So, what is a tag? Basically it is a keyword that you assign to a photo that allows you to find it again.
Let's use an example of donuts. Say you like going for donuts each week or month, or you just really like taking photos of donuts. If you tag your donut photos with the same keyword, over time you will have a great collection of photos to use. You could gather these photos and use them in a layout, create a photo book, mini book, print a bunch out and hang them on your wall…you get the idea.
Here's a screenshot of the tag "donuts" in my Collect App.
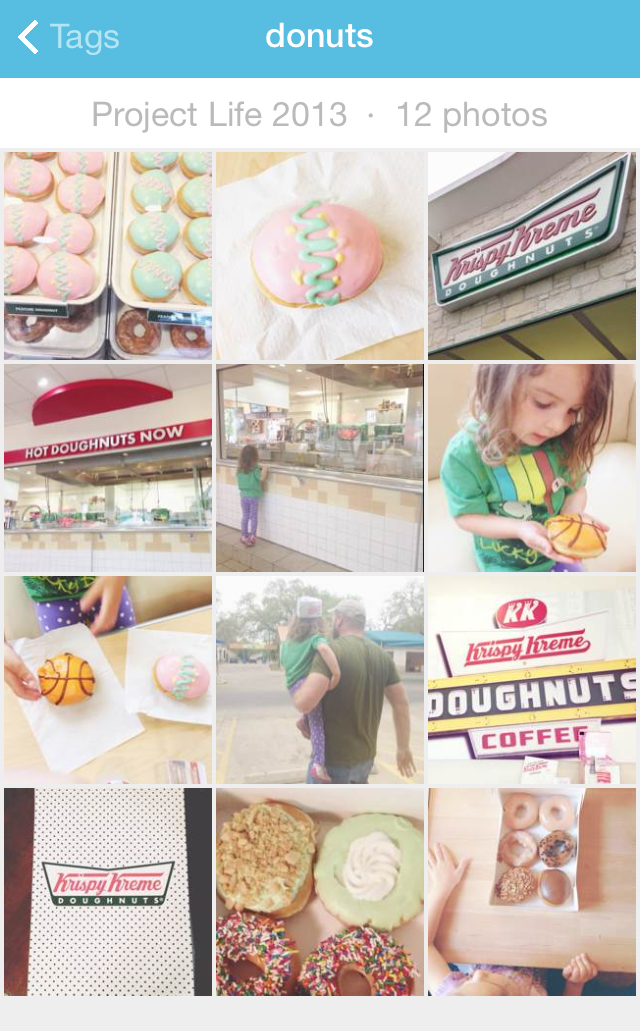
Not sure if this makes me want to make a layout or go on a donut run, but it is fun nonetheless!
For an awesome example of a Project Life® layout of a theme, check out this amazing page about coffee from Elise Blaha Cripe.
Let's use an example of donuts. Say you like going for donuts each week or month, or you just really like taking photos of donuts. If you tag your donut photos with the same keyword, over time you will have a great collection of photos to use. You could gather these photos and use them in a layout, create a photo book, mini book, print a bunch out and hang them on your wall…you get the idea.
Here's a screenshot of the tag "donuts" in my Collect App.
Not sure if this makes me want to make a layout or go on a donut run, but it is fun nonetheless!
For an awesome example of a Project Life® layout of a theme, check out this amazing page about coffee from Elise Blaha Cripe.
For additional ideas on topics to use for tags, I would highly recommend any class by Stacy Julian. I've taken her Library of Memories/Photo Freedom classes and they are so great. She is the queen of "connection based pages" as she calls them and really does have some great systems for gathering your stories. The class, Inspired Scrapbooking at Big Picture Classes has lots of great ideas for topics you may want to use for tags.
Another resource highlighting stories/themes/topics is the eBook Project Dig Deep at Big Picture Classes, where we took a theme/topic inspired by our chronological scrapbook/Project Life and then created new pages about that theme. My topics were personality and traditions. Both were fabulous topics for me, and I adore these pages, but since I had not been using tags, gathering the photos was a pain in the you know where. That's when I really understood the power of using tags, and although I do use them more than I used to, I still don't use them as much as I should. Seriously, they are so easy to add. It only takes a few more taps and then all that curating power is literally at your fingertips.
Okay, so are you ready to get started? Here is a step by step of how I use them in the app Collect.
The first thing you need to do is add a tag to your photo card in Collect.
Start by tapping the edit icon to bring up the edit screen. Here is where you add your title, notes, etc. You can also tap Tags and the tags screen comes up. Here you can add a tag by typing it in the box. You can also search with this screen or just move the screen up or down to find your tag. I honestly don't have too many tags or I would get overwhelmed.
You can see below, all you do is tap to select your tag, and you can select more than one for a photo. On the bottom right you can see the tag is now added to the photo card, and when you do a search from your main calendar view, this will now be included in the search.
The second step isn't actually required, but it's a nice feature so you can get a view of what photos you have tagged. This is helpful if you are wanting to do a collage with a certain number of photos. If you don't have enough, you can go back through the photos and see if there are more that you can tag, which is what I did for my collage. I knew I had started a pretty good collection, but had been a bit lazy about adding tags. (I honestly consider it a pretty big accomplishment if I even get photos added, so adding tags for me is like adding the lime to my Diet Coke…it's just so good and easy to do but I never want to actually slice up the lime. Just too much work so it seems. But seriously so good if I will do it!)
To search tags, from your main calendar view, tap the bottom right icon. It's three little dots. When you tap that, the search tags and show dates comes up. Tag "Search tags" and the next screen is the tag screen, where you can search or scroll to find your tags. Simply tap on the tag you want and then it will bring up all the photos you have tagged.
Here is my 2014 album. You can see there are 20 photos. Below that you can see my 2013 album, which has 66 photos. Plenty for me to use for the mega collage. I just repeated the export process for both albums. (I'll go more into why I do different albums for each year in another post.)
Now you are ready to begin exporting your photos to use in your collage. (You can also use them for a scrapbook or Project Life®/pocket page layout, mini book, photo book or other photo project.)
From your main calendar view, this time tap on the bottom left icon, which looks like a little rectangle with an up arrow on it. Tap on that icon and the Export Photos option opens up. Tap on Export Photos, then for photos only, select Export Style and then the Photos Only.
You can change the dates by selecting those, scrolling back to January or whenever you started your album.
Next, tap the back arrow so you are on the main Export page. Now you are ready to select the tag to export.
Tap on the Tags button and the Tags screen will come up. Select the tags you want to export and then select back to the main export page.
Now you are ready to export! At the very bottom is the Export button. Tap Export, and either Camera Roll or Dropbox for where you want to save your photos to. I selected Camera Roll. Photos will be exported to your camera roll. (note if you have a lot it may take a few minutes)
And there you have it! Photos from a tag that you have now curated over time to really show the story you want to tell with photos. (You can always add words, and I highly suggest that you do, but photos curated over time really tell a story as well.)
Challenge for you: create some tags and see if you can tag at least 9 photos for our challenge next week. I will walk you through how to create a collage next week, so you will need at least 9 if you want to do one of the 9 photo collages. If you want to add more, try tagging 36, and if you want to do the super mega one, you will need 81. (you can always add several of the same photo, especially when they are small it's not too big of a deal.)
Then export the photos so they are ready to use. If you are playing along using other software or another app, export and save your photos so they are ready to be made into a collage next week.
So let's get tagging and curating those stories we want to tell. We can do it!